
Masking tape
For positioning marks and a top, side or center hinge.
Dry installation guide
Your decal arrives ready to apply with transfer tape holding every letter and shape in position. Choose the technique that fits its size, then follow the photos and short steps below.
DRY APPLICATION ONLY — no water, soap or application fluid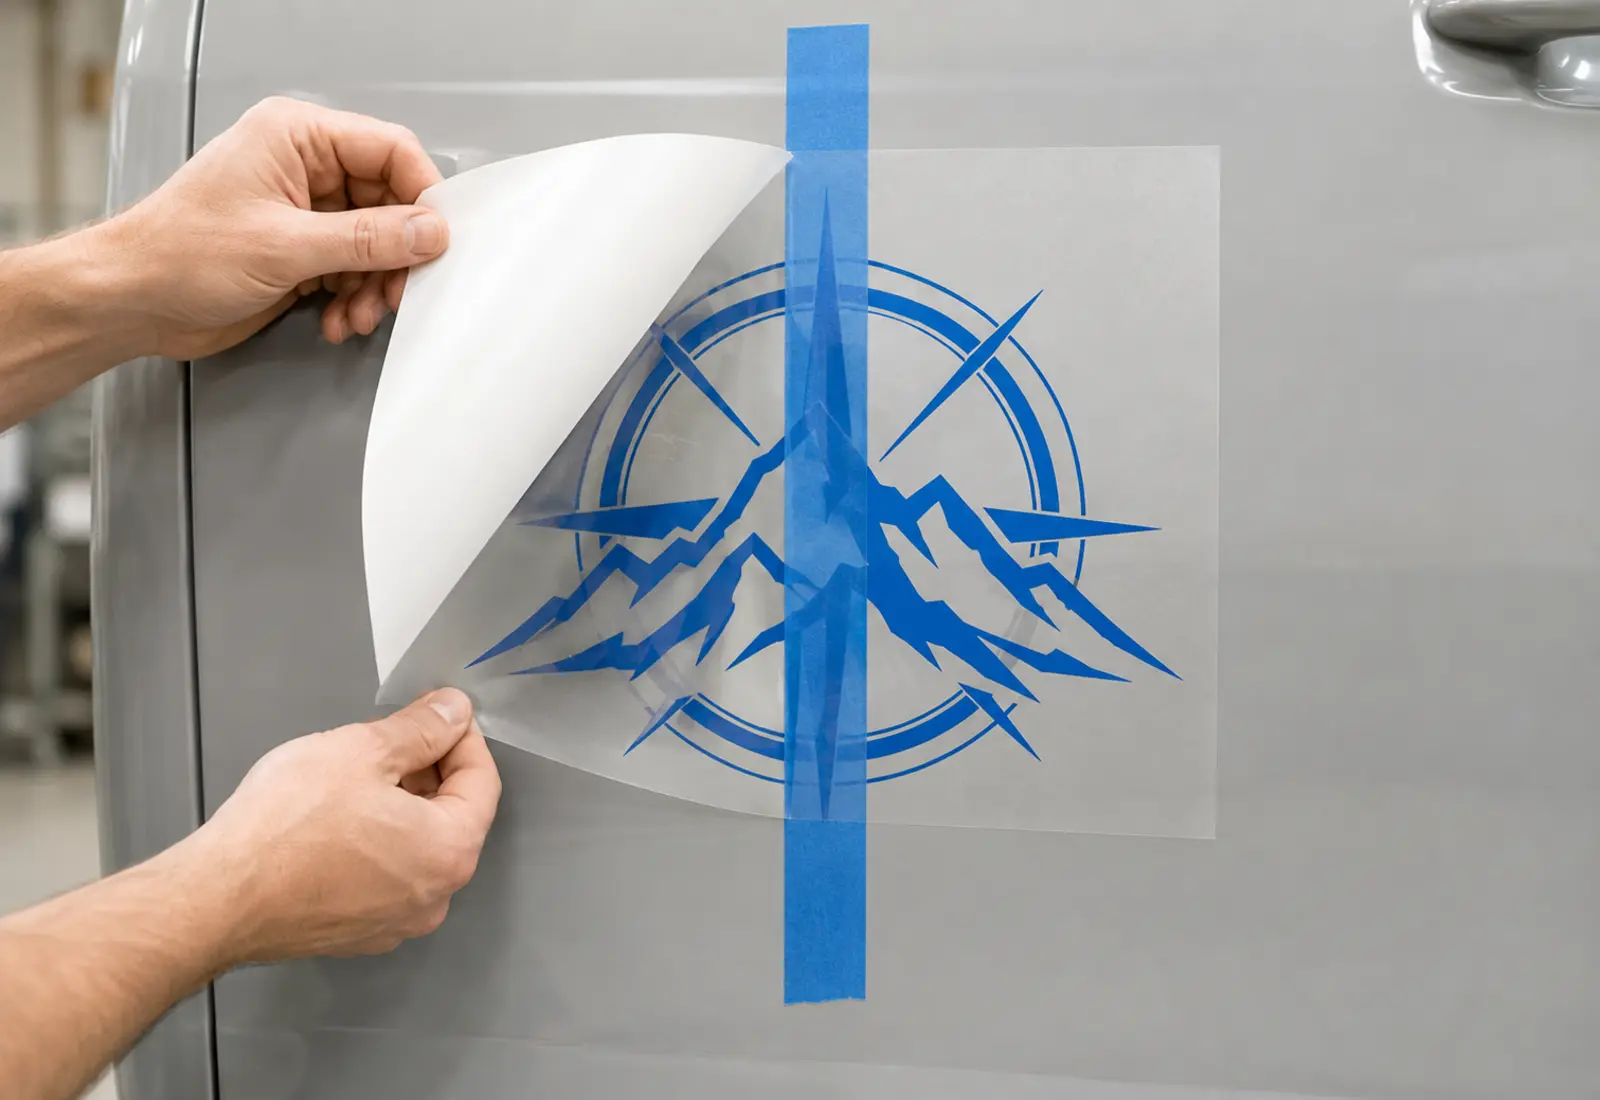
Before touching the backing
Work indoors or in a calm, dust-free place. The surface, decal and air should all be dry and within the vinyl manufacturer’s recommended temperature range.
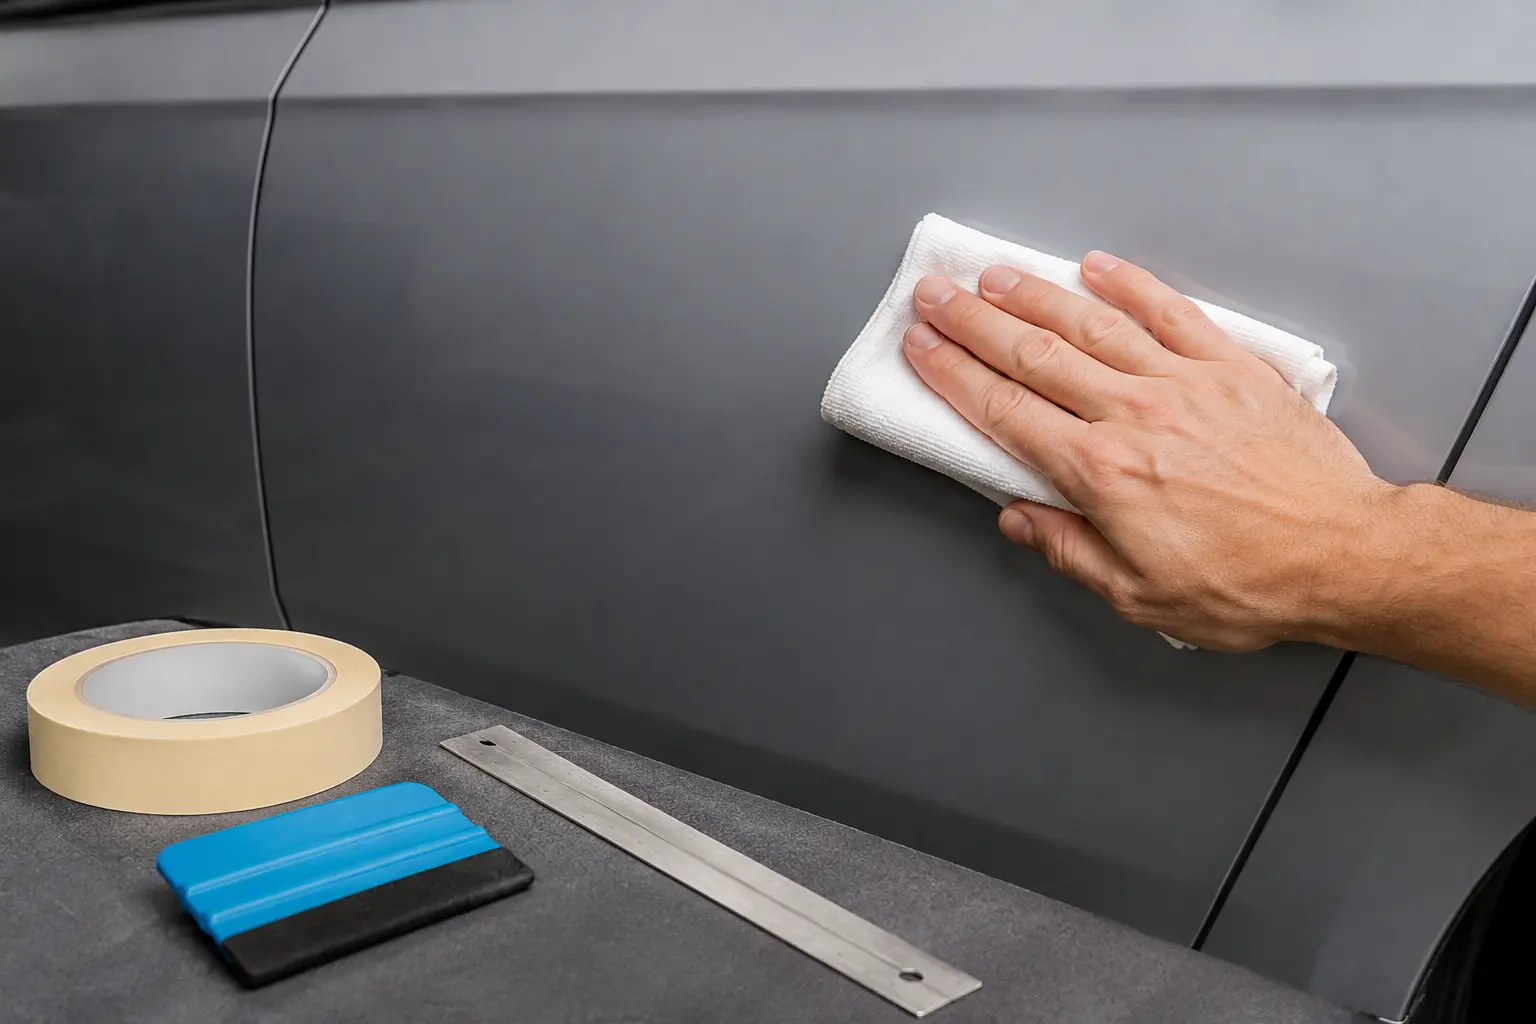
For positioning marks and a top, side or center hinge.
A clean squeegee or a firm card wrapped in a soft cloth.
For a dust-free, fully dry application surface.
For the final wipe on compatible smooth surfaces; let it evaporate completely.
This guide intentionally uses no wet-install method. Trapped liquid can delay adhesion, hide contamination and make a pressure-sensitive decal harder to finish correctly.
Know the three layers
Keeping the layers straight makes every method easier. The transfer tape carries the complete design; the backing paper protects the adhesive until installation.
Choose your technique
There is no prize for removing the entire backing at once. Larger or longer decals are easier when the liner is removed gradually.
See the hand positions
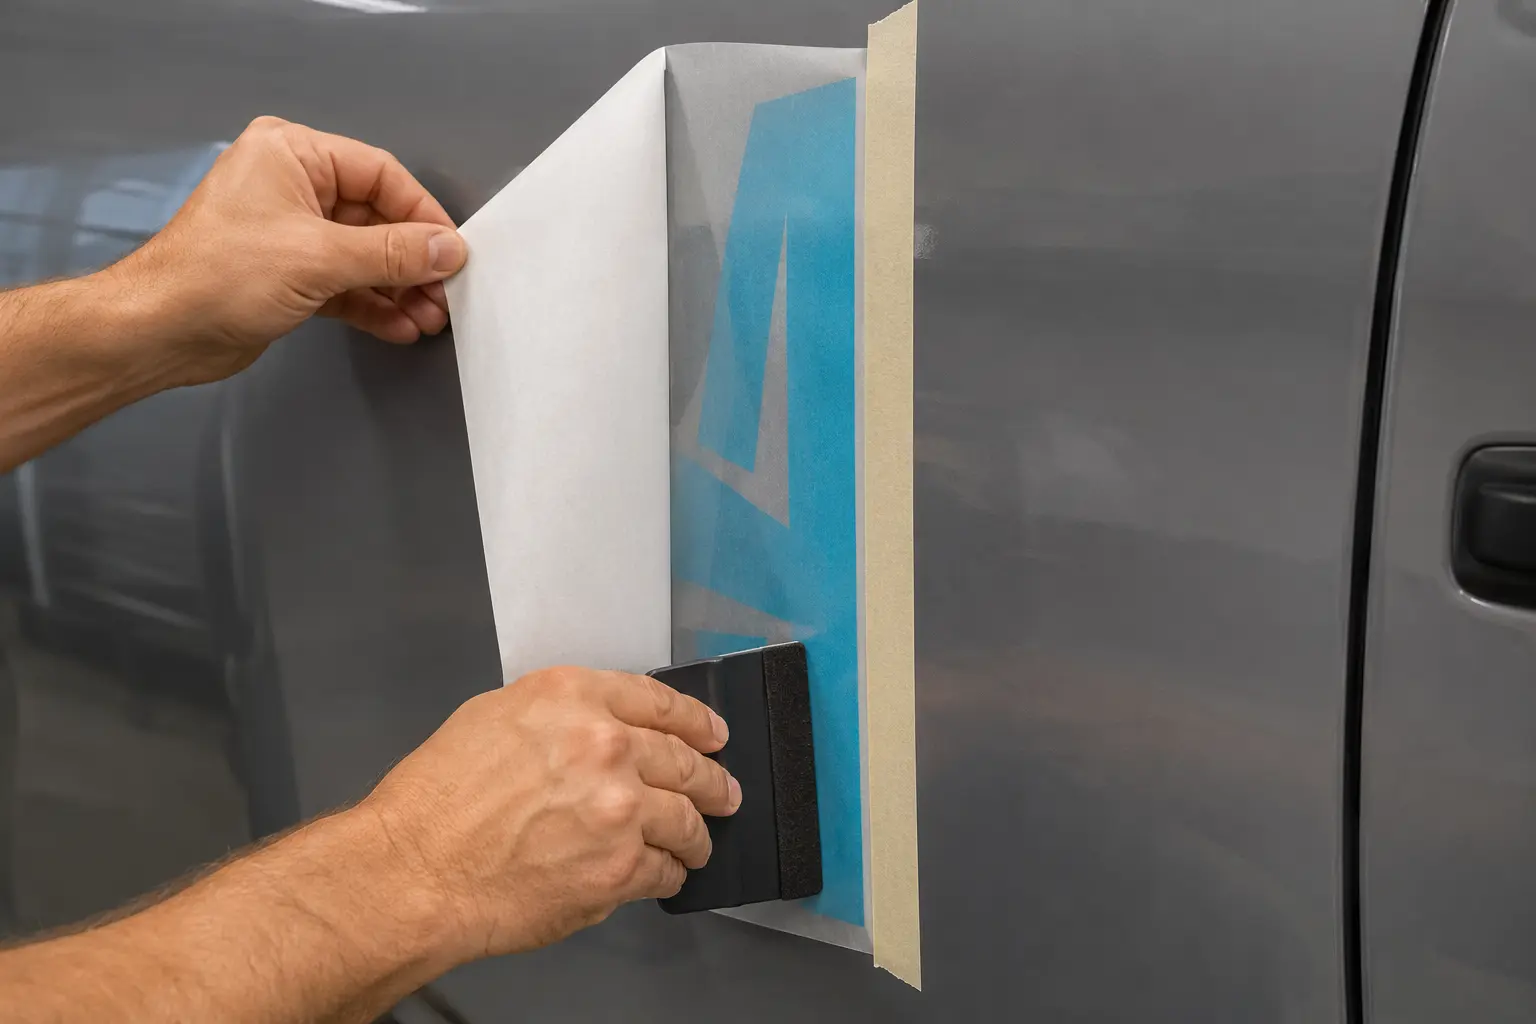
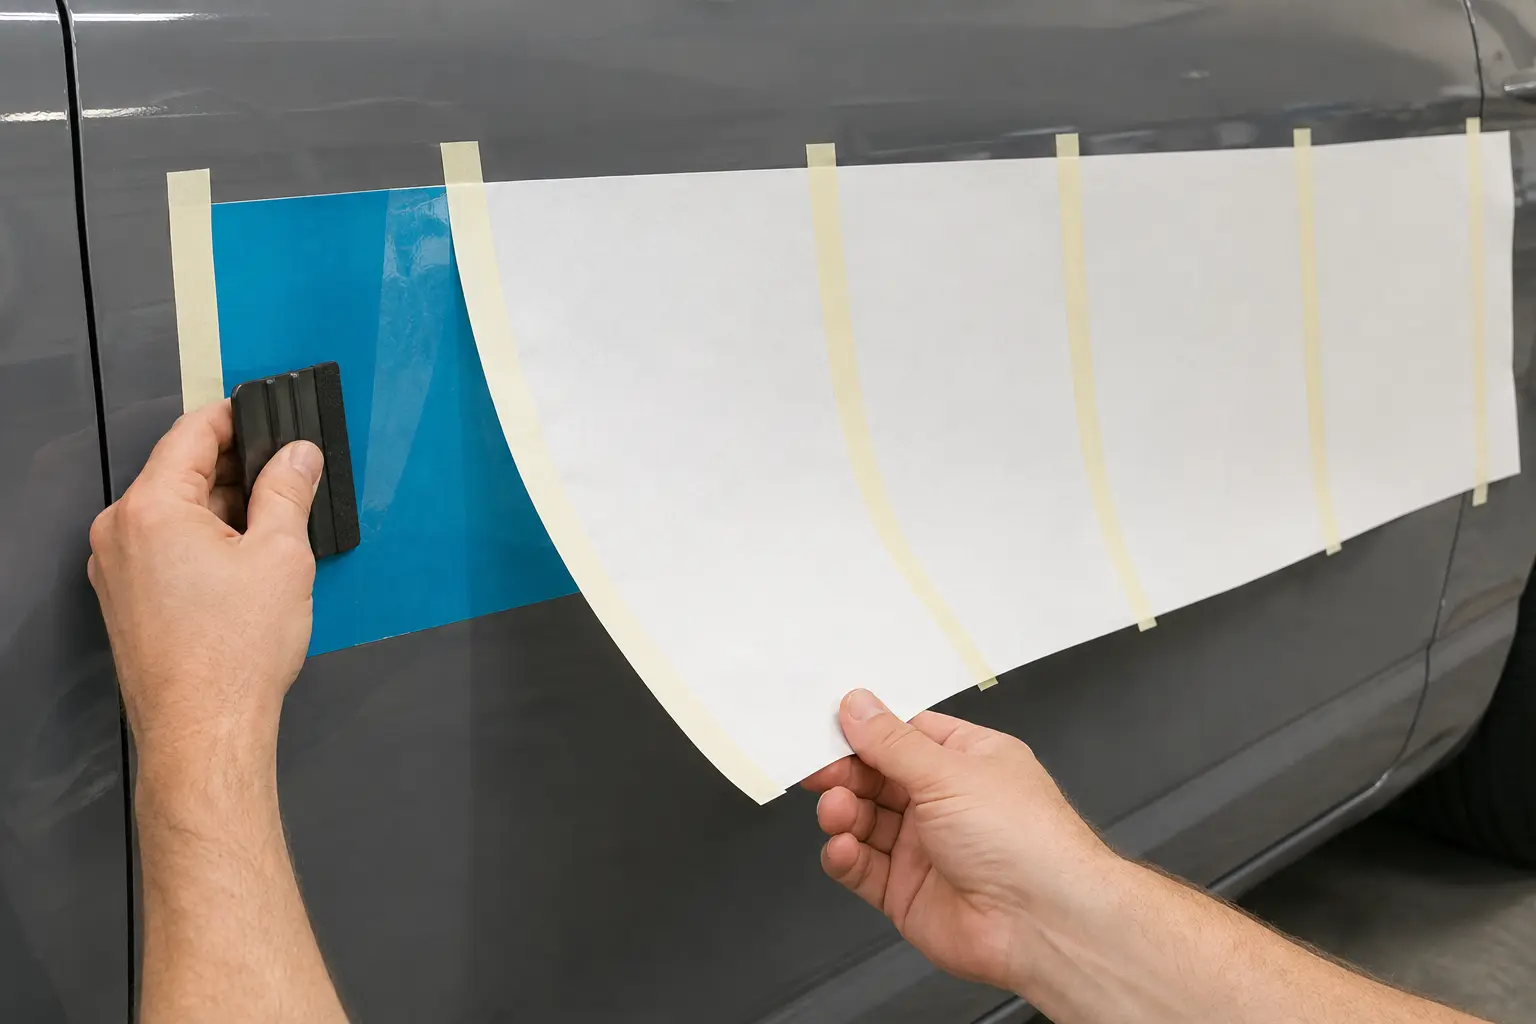
Look at what stays taped, what remains suspended and how little backing is exposed at one time. These details make a dry installation easier to control.
 01
01Wipe the final area with a lint-free cloth and let compatible cleaner evaporate before positioning the decal.
 02
02Tape one complete vertical edge, keep the adhesive suspended and squeegee away from the hinge.
 03
03Expose and apply only one manageable section while the remaining backing continues protecting the adhesive.
Technique 1 — maximum alignment
Use a vertical or horizontal center hinge—whichever crosses the shortest distance. It divides the job into two controlled halves and is the safest choice when exact centering matters.
Leave all backing attached. Measure, level and hold the complete decal with small tape tabs.
Apply two firm strips of masking tape through the center, perpendicular to the decal’s longest direction.
Fold one half back. Peel the backing to the hinge and cut only the loose backing paper. Hold the adhesive away from the surface.
Starting at the hinge, use firm overlapping strokes toward the closest edge. Remove the hinge and repeat for the other half.
Technique 2 — controlled top-down pose
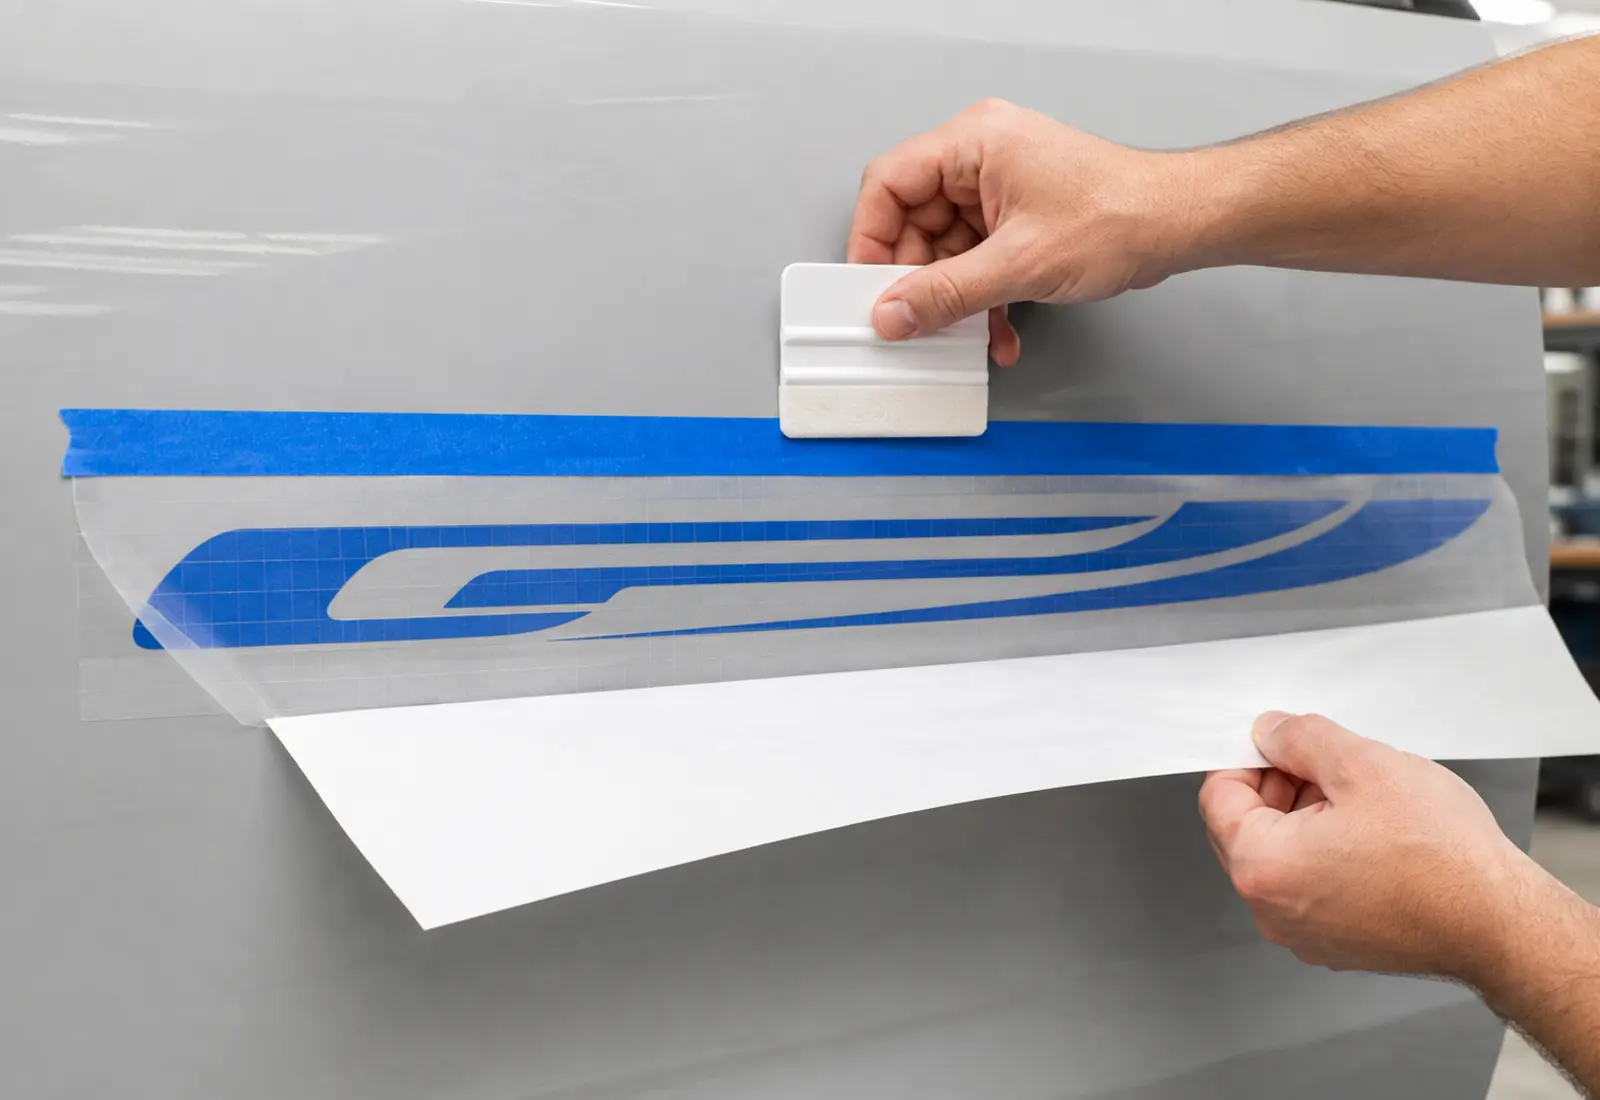
A continuous tape hinge across the top locks the final position. Keep most of the backing in place and expose only the area you are ready to squeegee.
Measure and tape the decal in its final position while the backing is still attached.
Add a strong, continuous strip of masking tape along the complete top edge.
Lift the decal over the hinge and peel only a few centimetres of backing. Keep the exposed vinyl off the surface.
Squeegee from the top center toward each side with overlapping strokes. Peel a little more backing and repeat.
The motion that prevents bubbles
These six habits apply to every dry-install method.
Press the transfer tape firmly onto every piece before peeling.
Turn the backing paper back over itself instead of lifting the design upward.
Do not let un-squeegeed adhesive fall onto the surface.
Move the squeegee across the shortest route to an edge.
Cover part of the previous stroke so no narrow air channel is missed.
After the transfer tape is gone, re-squeegee the vinyl and all tips.
The final reveal
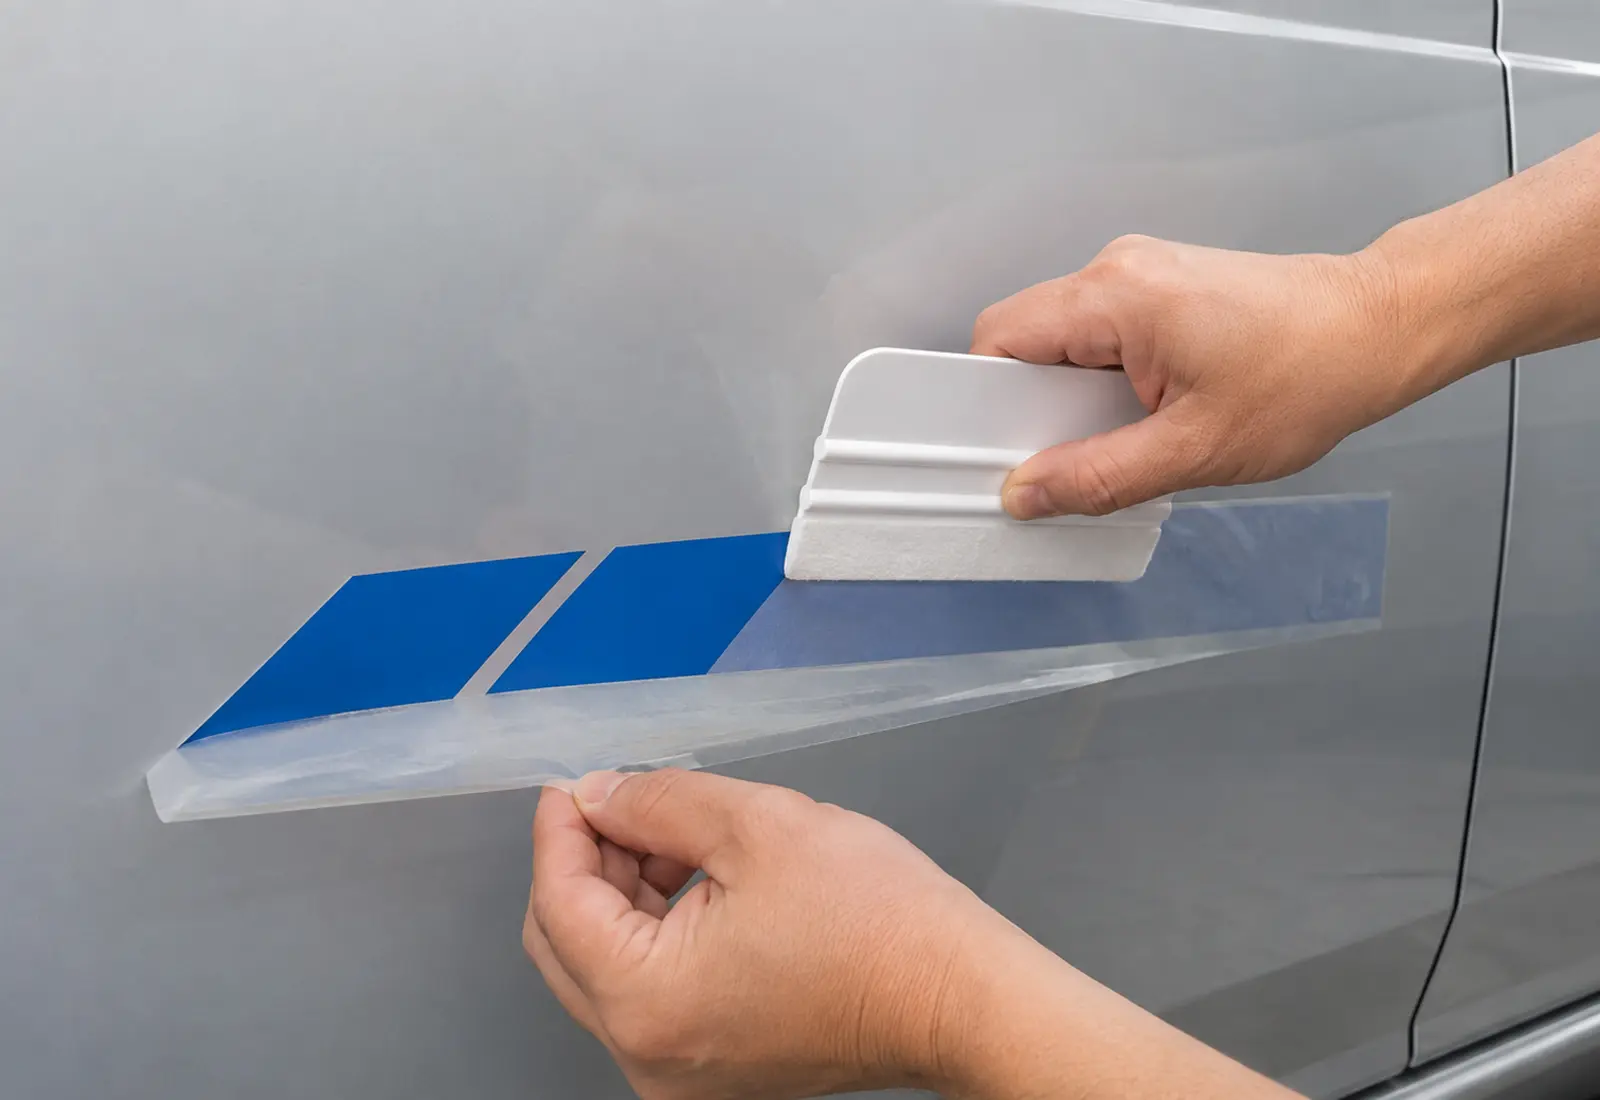
Wait until the complete design has been firmly squeegeed. Start at one corner and pull the transfer tape slowly back against itself at nearly 180 degrees. Watch the first letters as you go.
Quick fixes
Most problems can be corrected before the transfer tape is completely removed.
Lay it flat and squeegee the front again. Turn the backing paper sharply over itself and peel it away slowly; do not pull the transfer tape upward.
Put the tape back in place, press the letter firmly, wait a moment and resume with a slower, lower peel.
First push the air toward the nearest edge. For a stubborn enclosed bubble, use a very fine pin at one end—never a knife—then press the air toward the tiny opening.
Stop before it grows. Lift only the unapplied transfer-tape section, keep it taut without stretching the vinyl, and resume with shorter strokes.
Start at the center and work in small zones. Do not stretch calendared vinyl around a complex curve; ask us when the shape is deeply curved or textured.
Pause the installation. Move the item to a dry, temperature-controlled space and let the surface and decal acclimate before trying again.
Professional reference
This customer guide simplifies recognized dry-application procedures. Always follow the specific material and surface requirements that apply to your project.
Ready to apply
If your decal, surface or placement is unusual, send Eric & Nancy a photo before installation. We will help you choose the safest dry technique.